Ad. This how to style an IKEA Billy Bookcase post contains some pr products. They will be marked with an *. Keep reading for how to enter a competition to win some products to style your own home! More details to come on the bookcases themselves in another post and what we learnt as we went along. In short, we hacked the IKEA Billy Bookcase with their Oxberg glass doors to create some custom painted and fitted display cabinets in our living room. This first post is all about how to style an IKEA Billy Bookcase and its shelves.
How to Style : IKEA Billy Bookcase
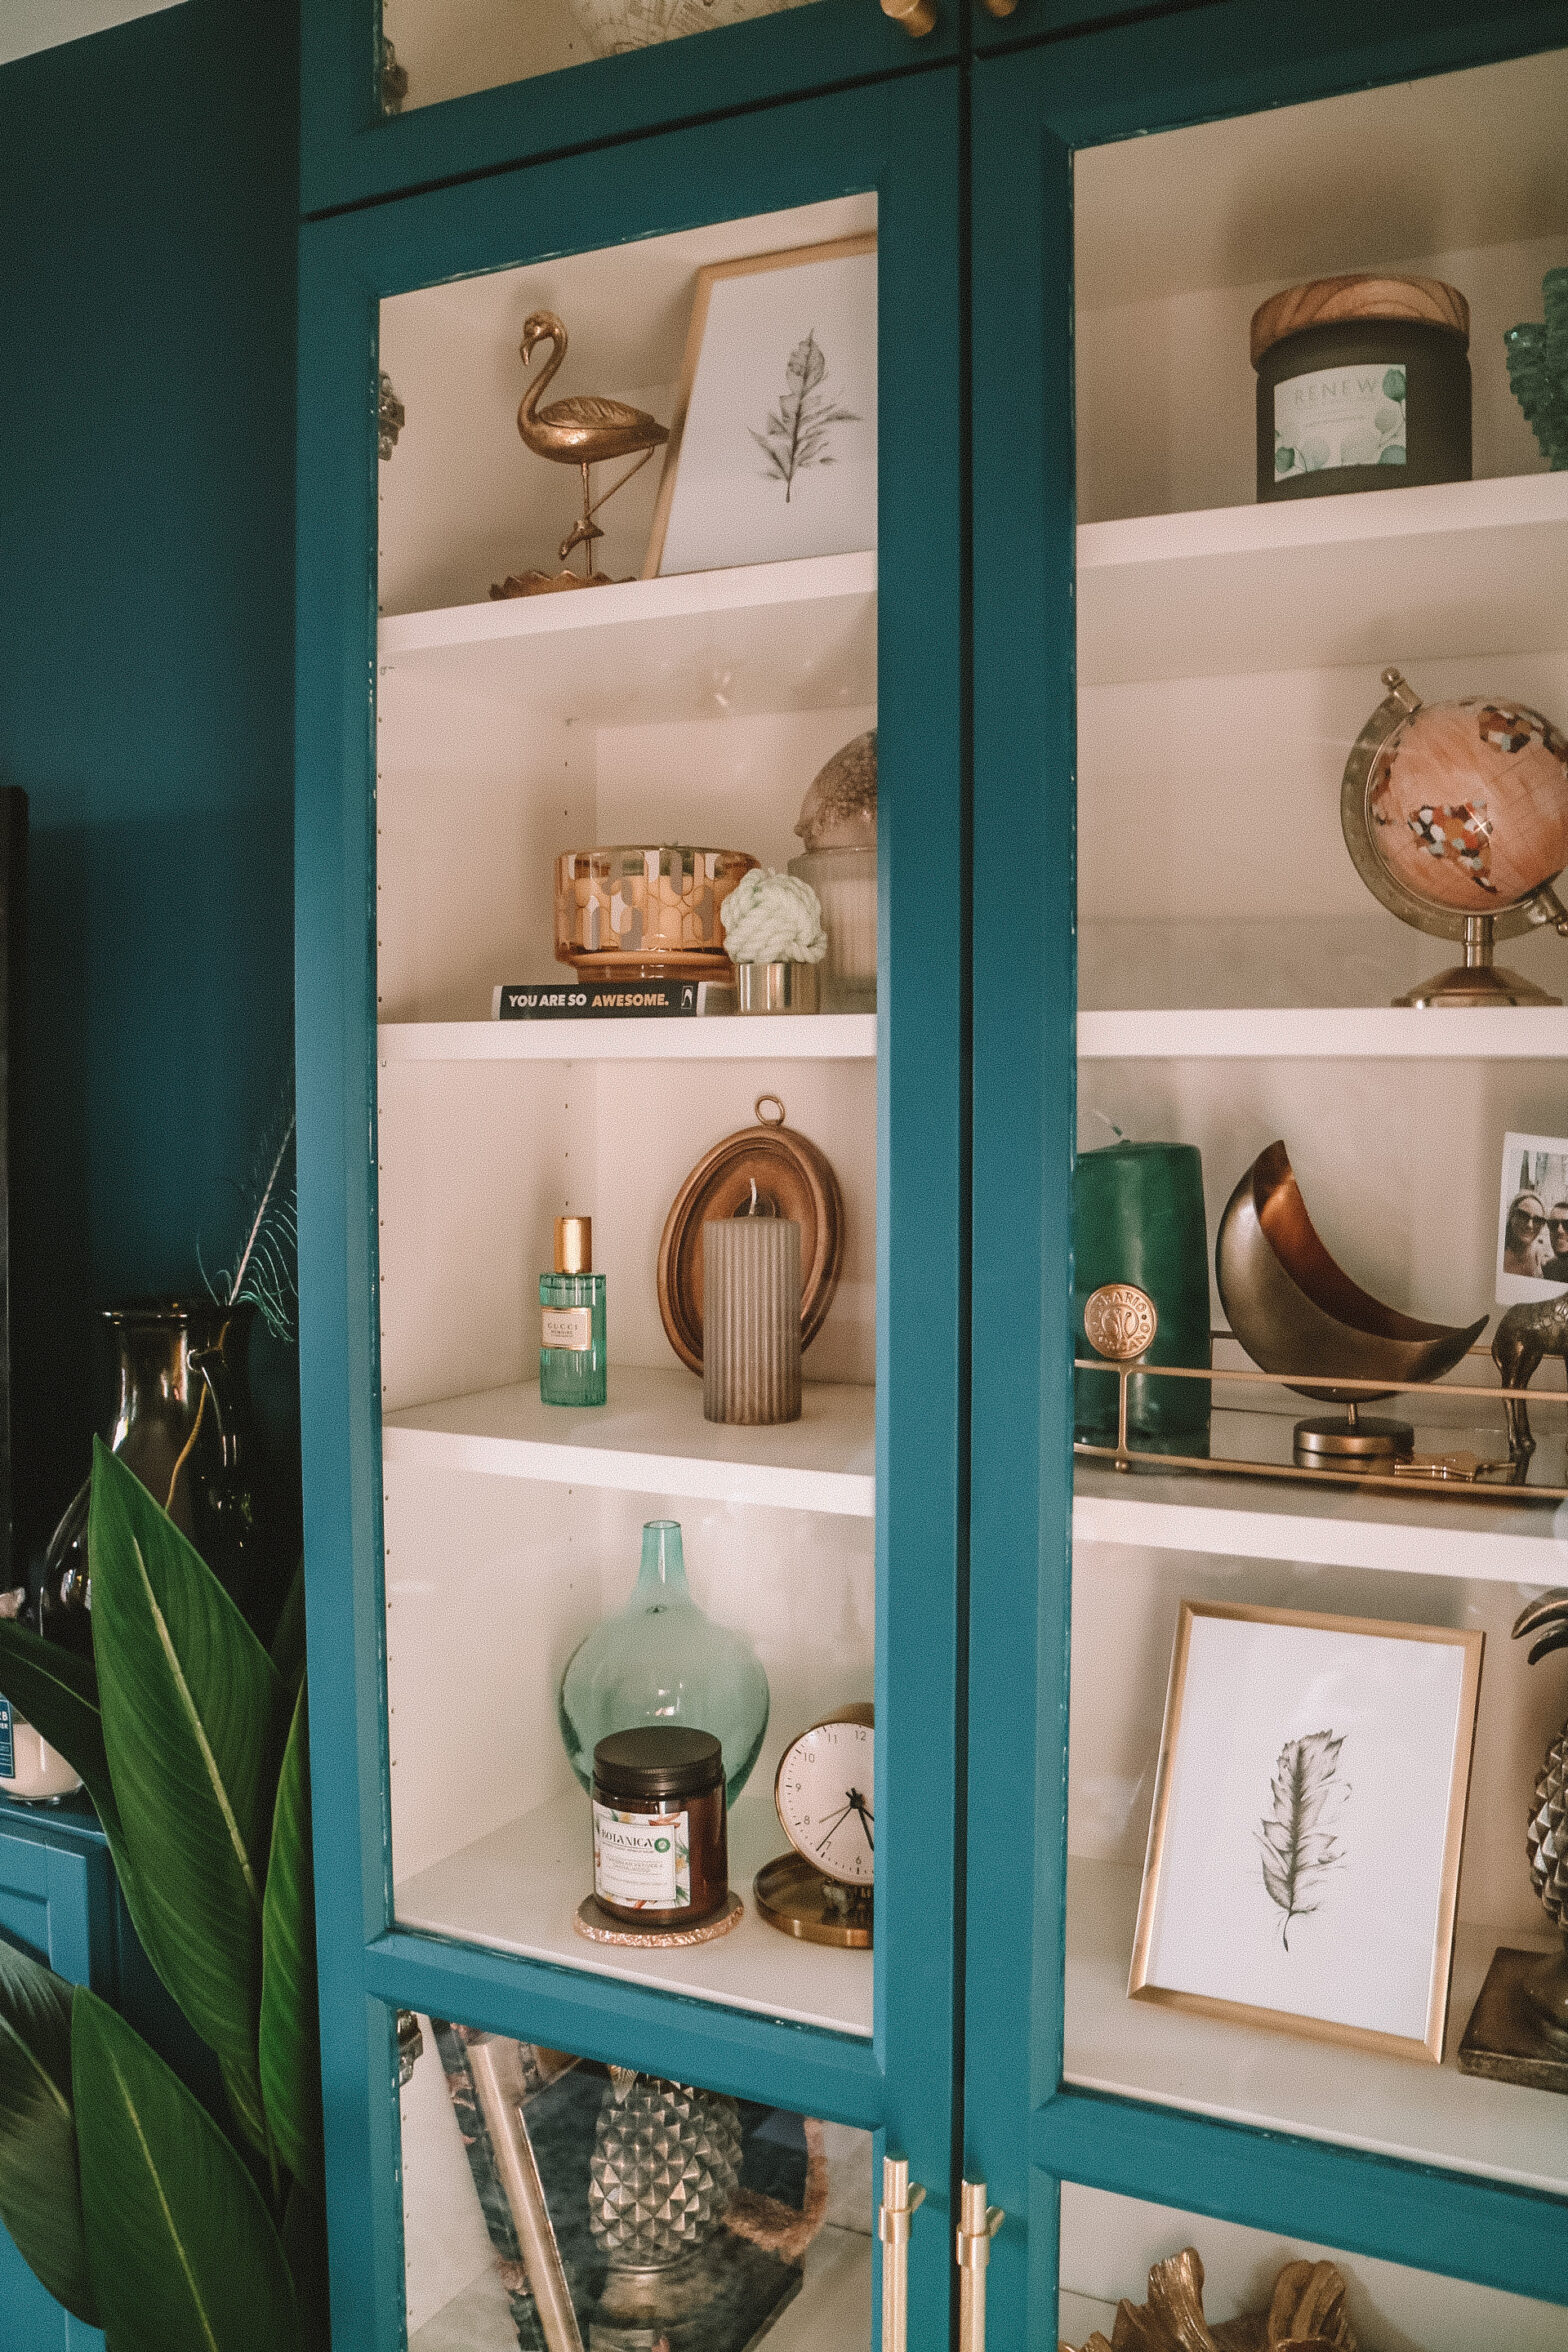
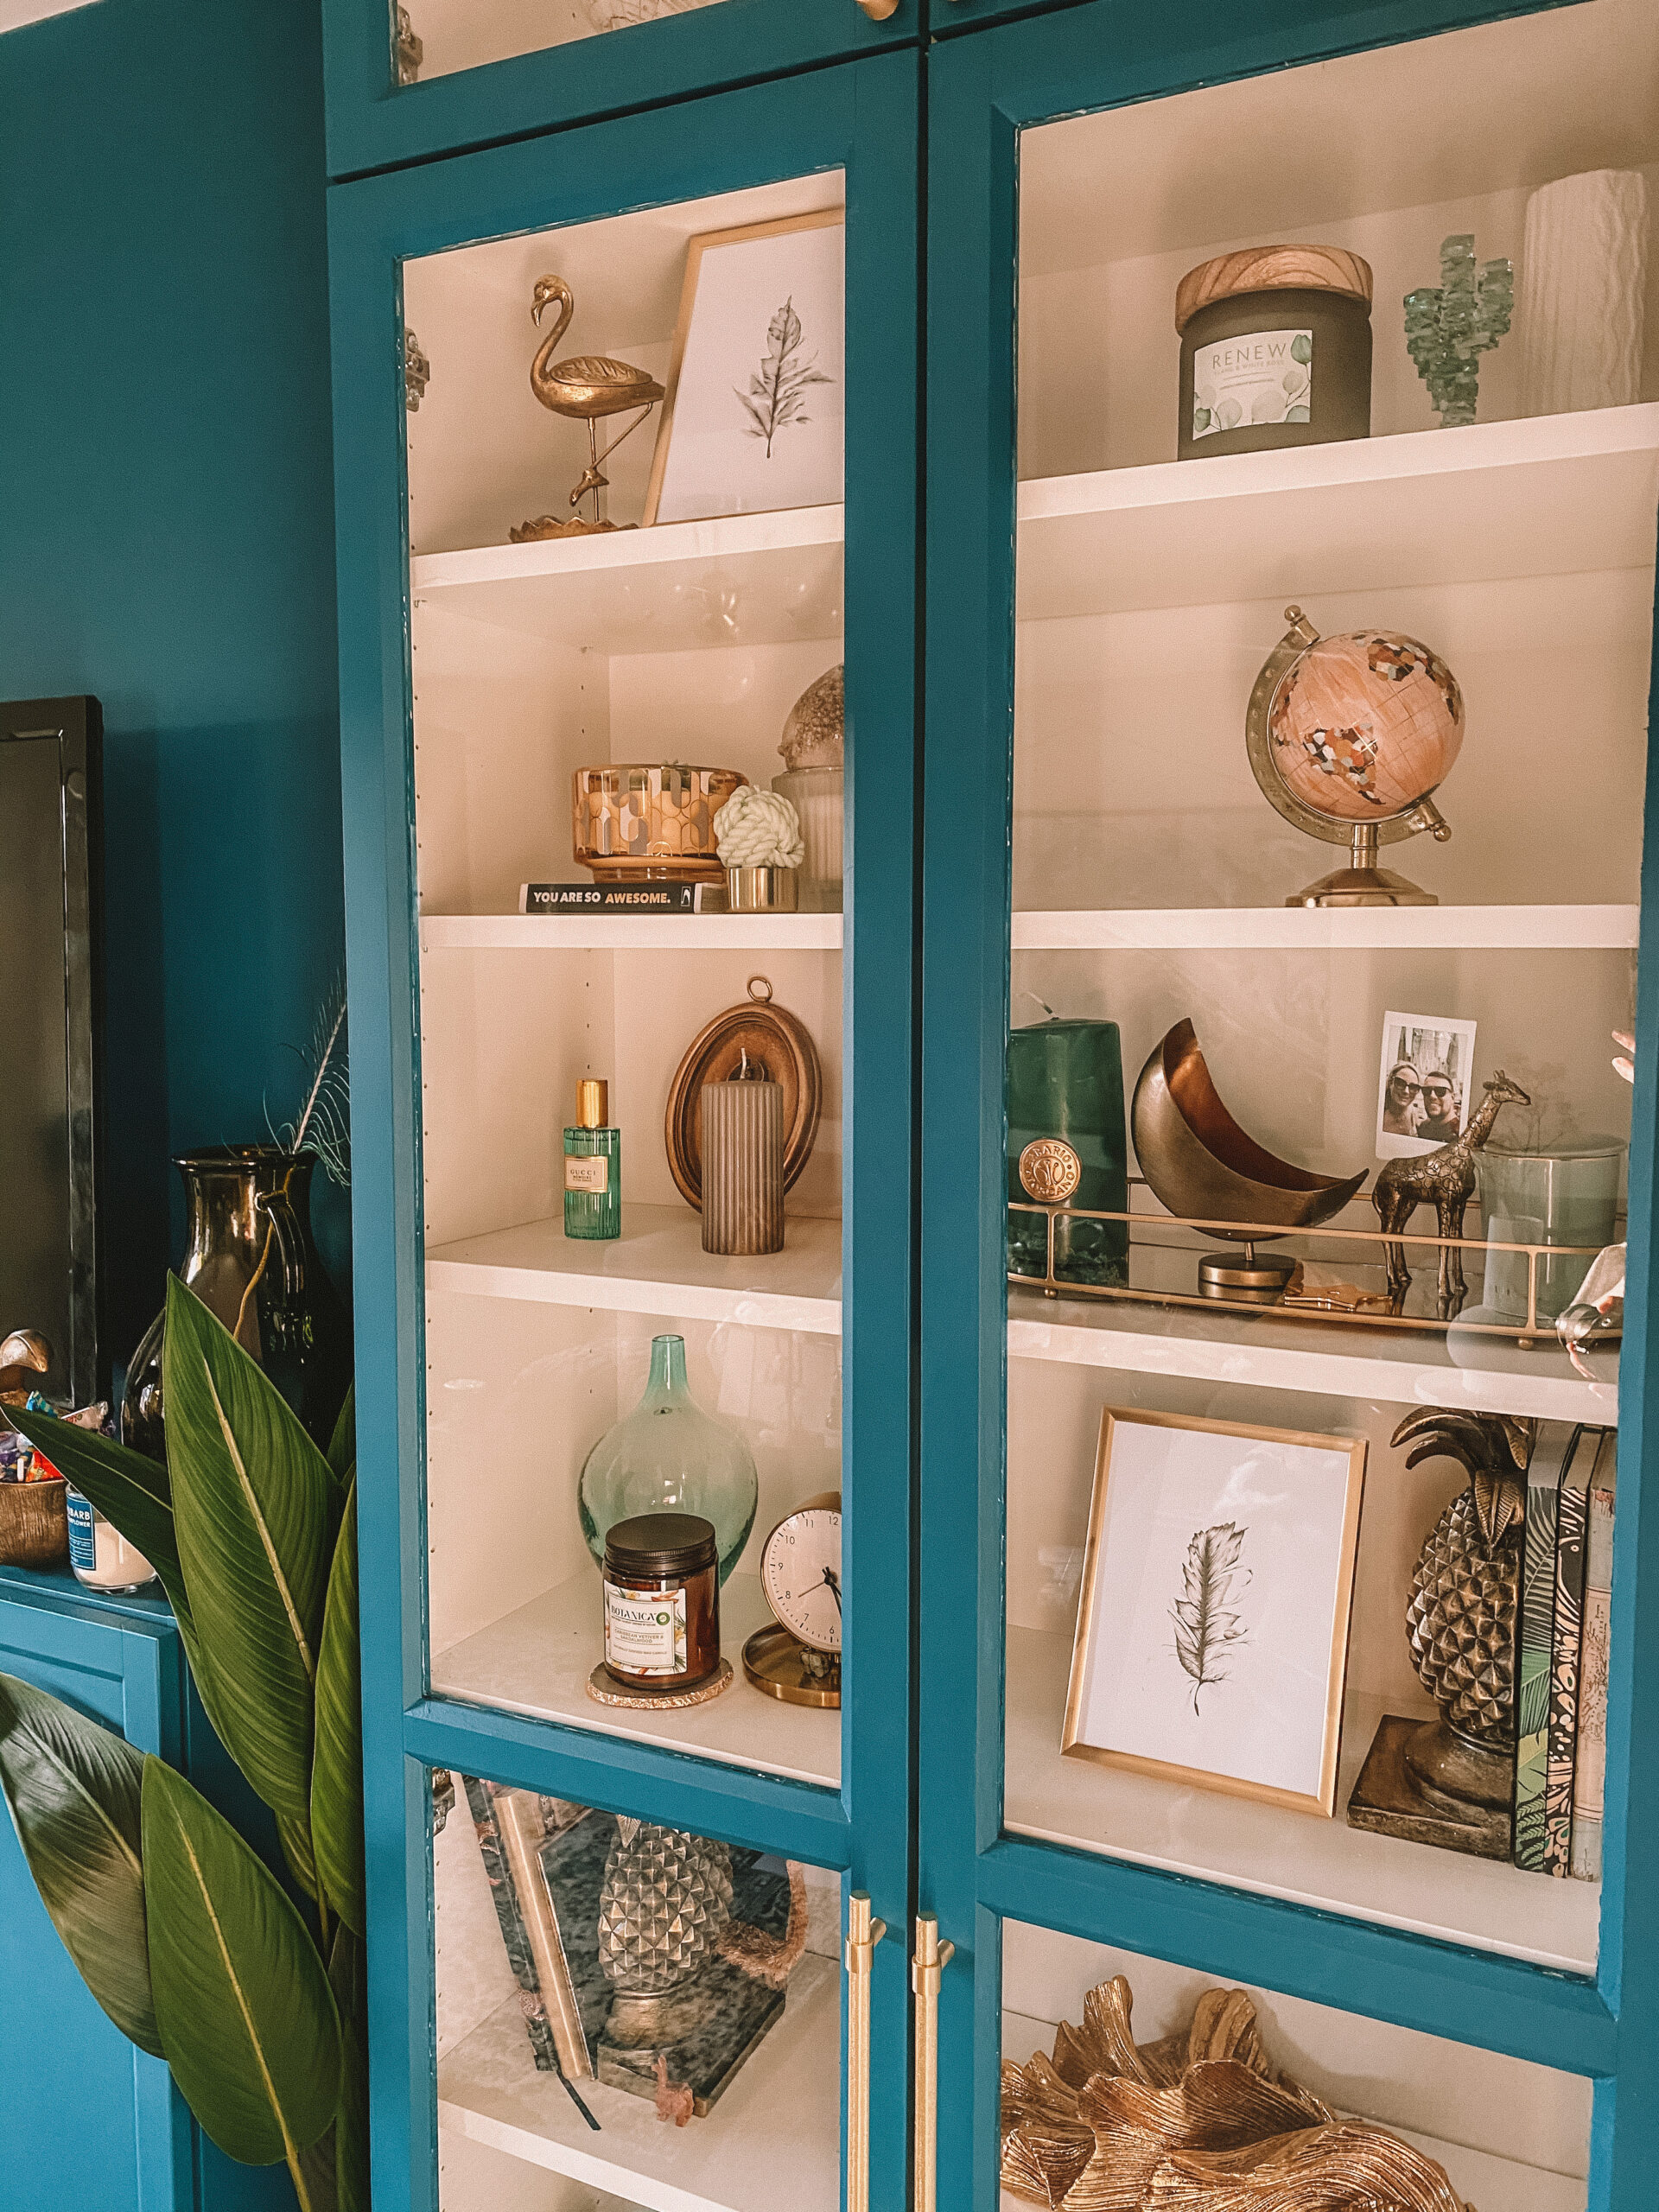
I just love trinkets, ornaments and art so arranging these inside my bookcase was my fave thing to do on the whole project! When you have a lot of things like me it’s easy to go OTT though. However, I managed to restrain myself a little and these three steps were key to getting there.

Balance
The aim of a larger fully shelved cabinet like this one is to create a balance across the space. You don’t want to have all large pieces together or similar items all in one section. You are looking to create symmetry and balance across it all. It helps with us having the Oxberg doors as they carve up the space quite nicely. Allowing me to look at symmetry across the shelves easily.
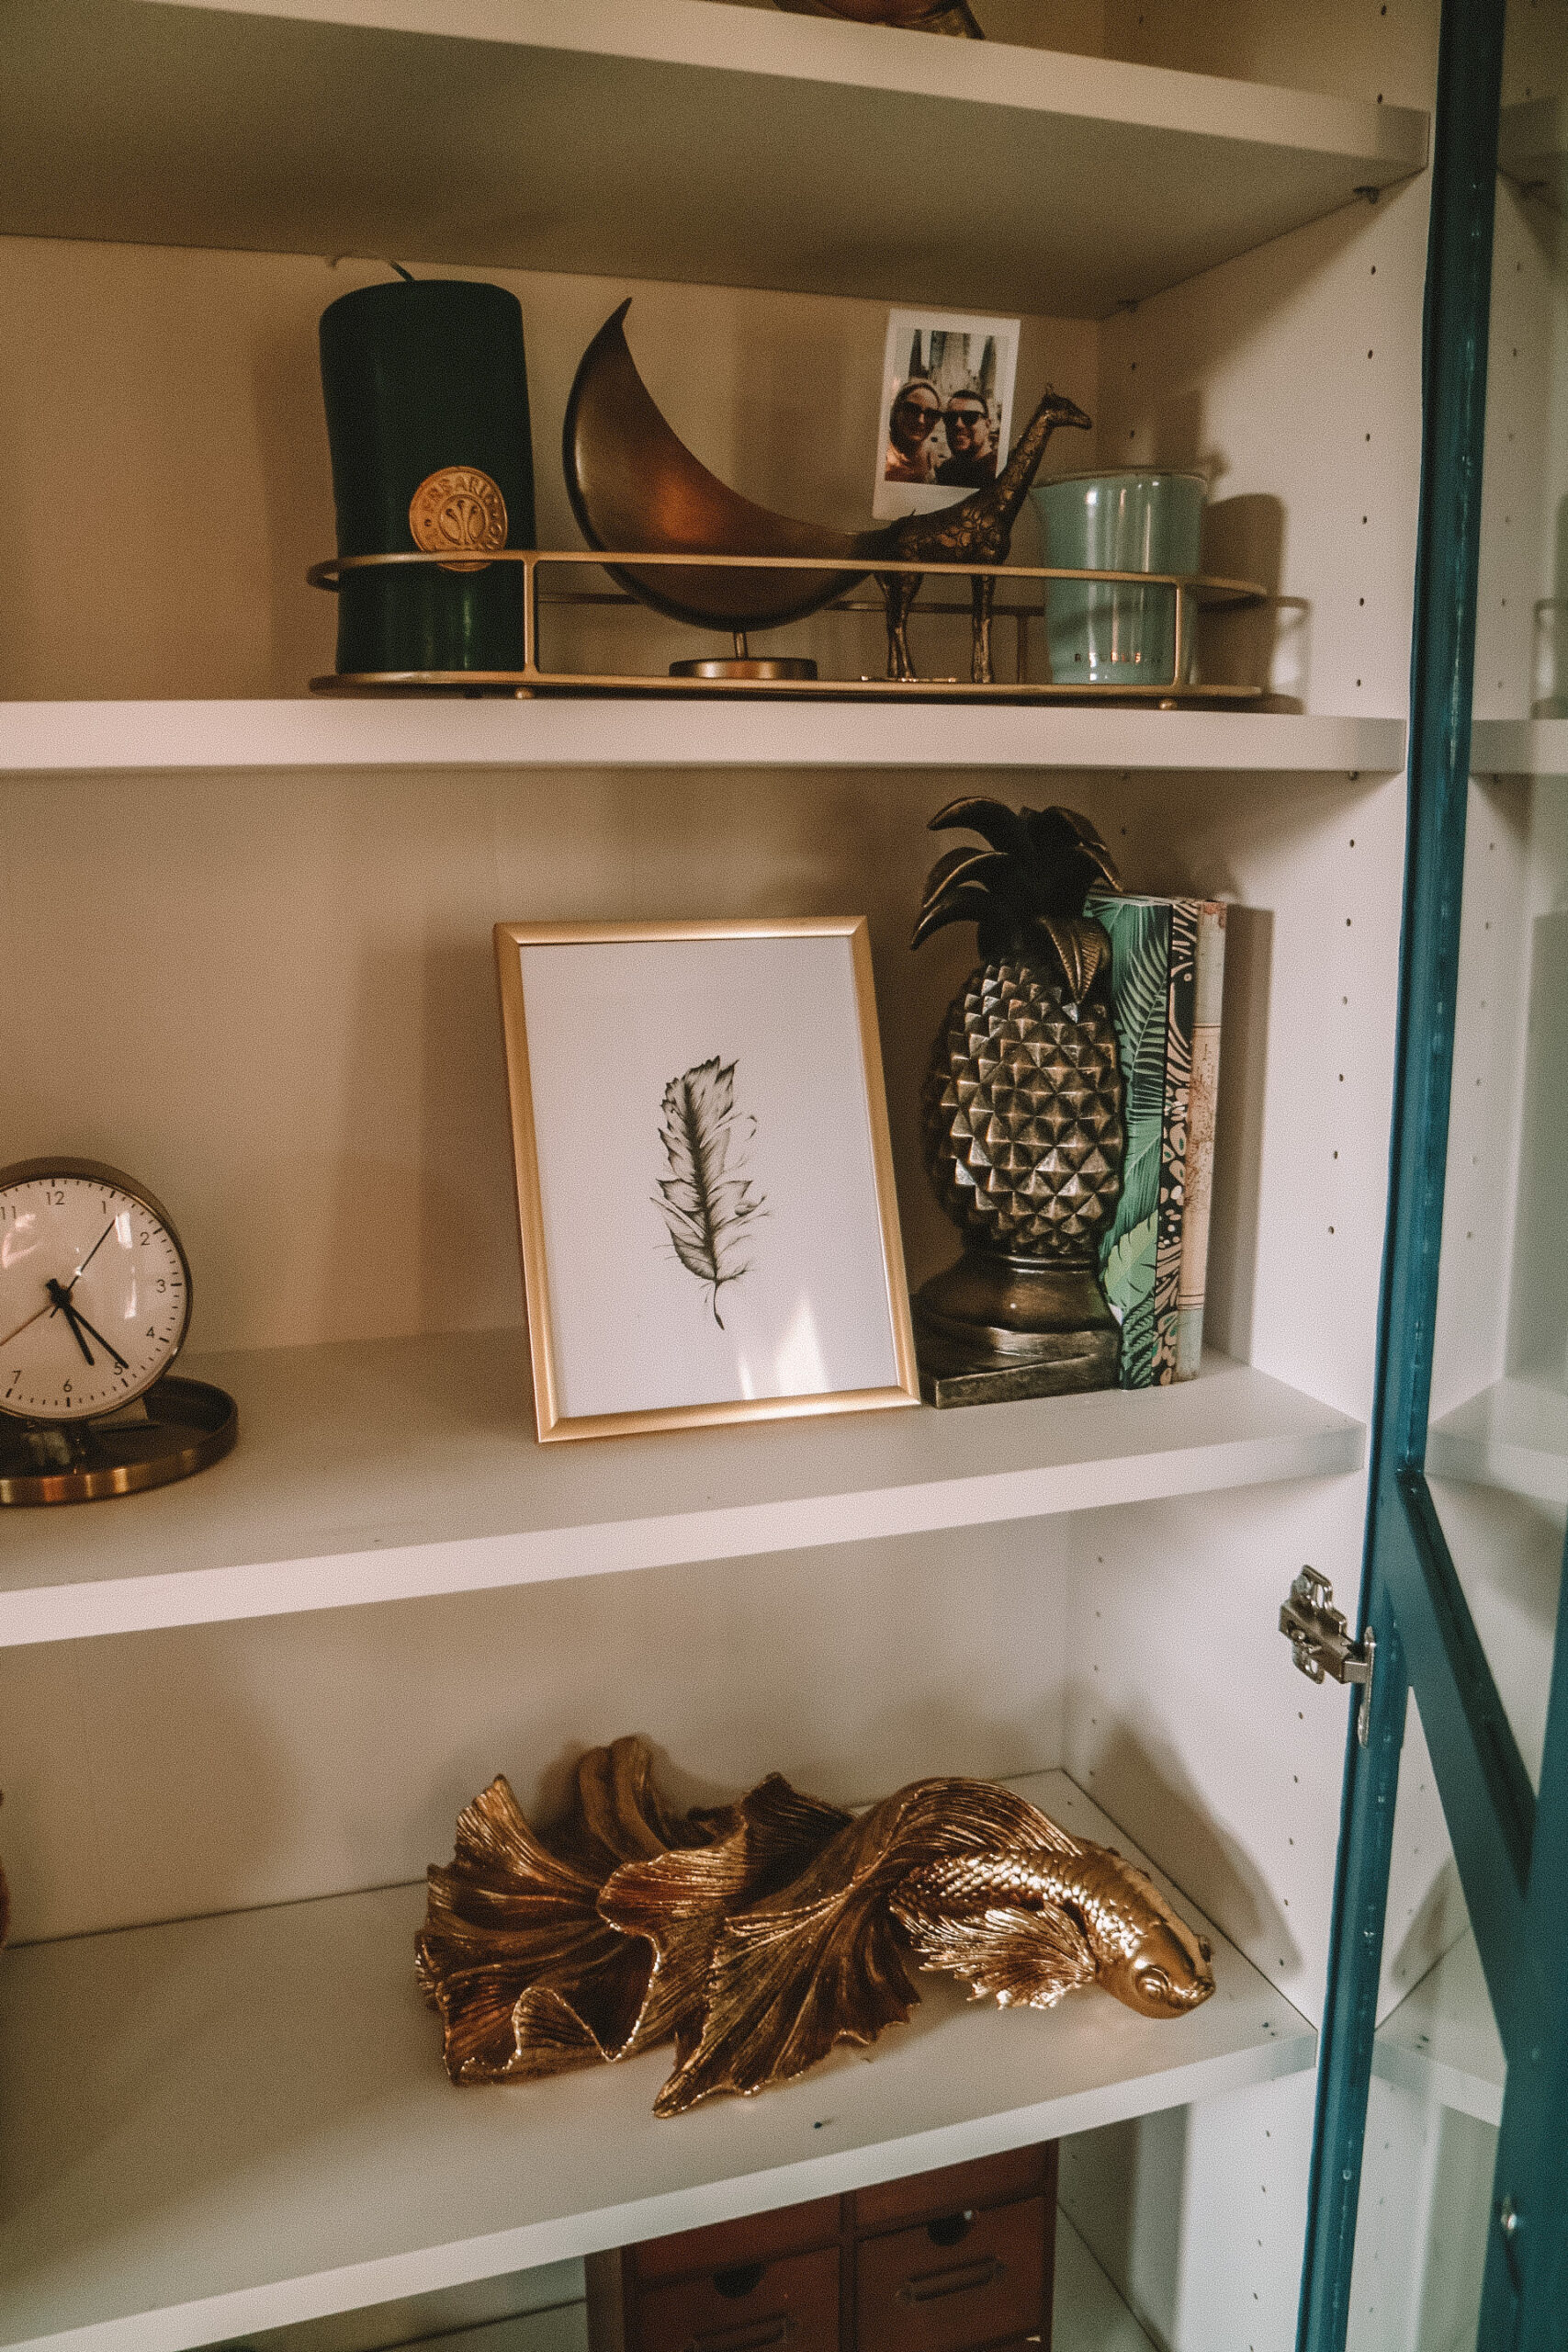
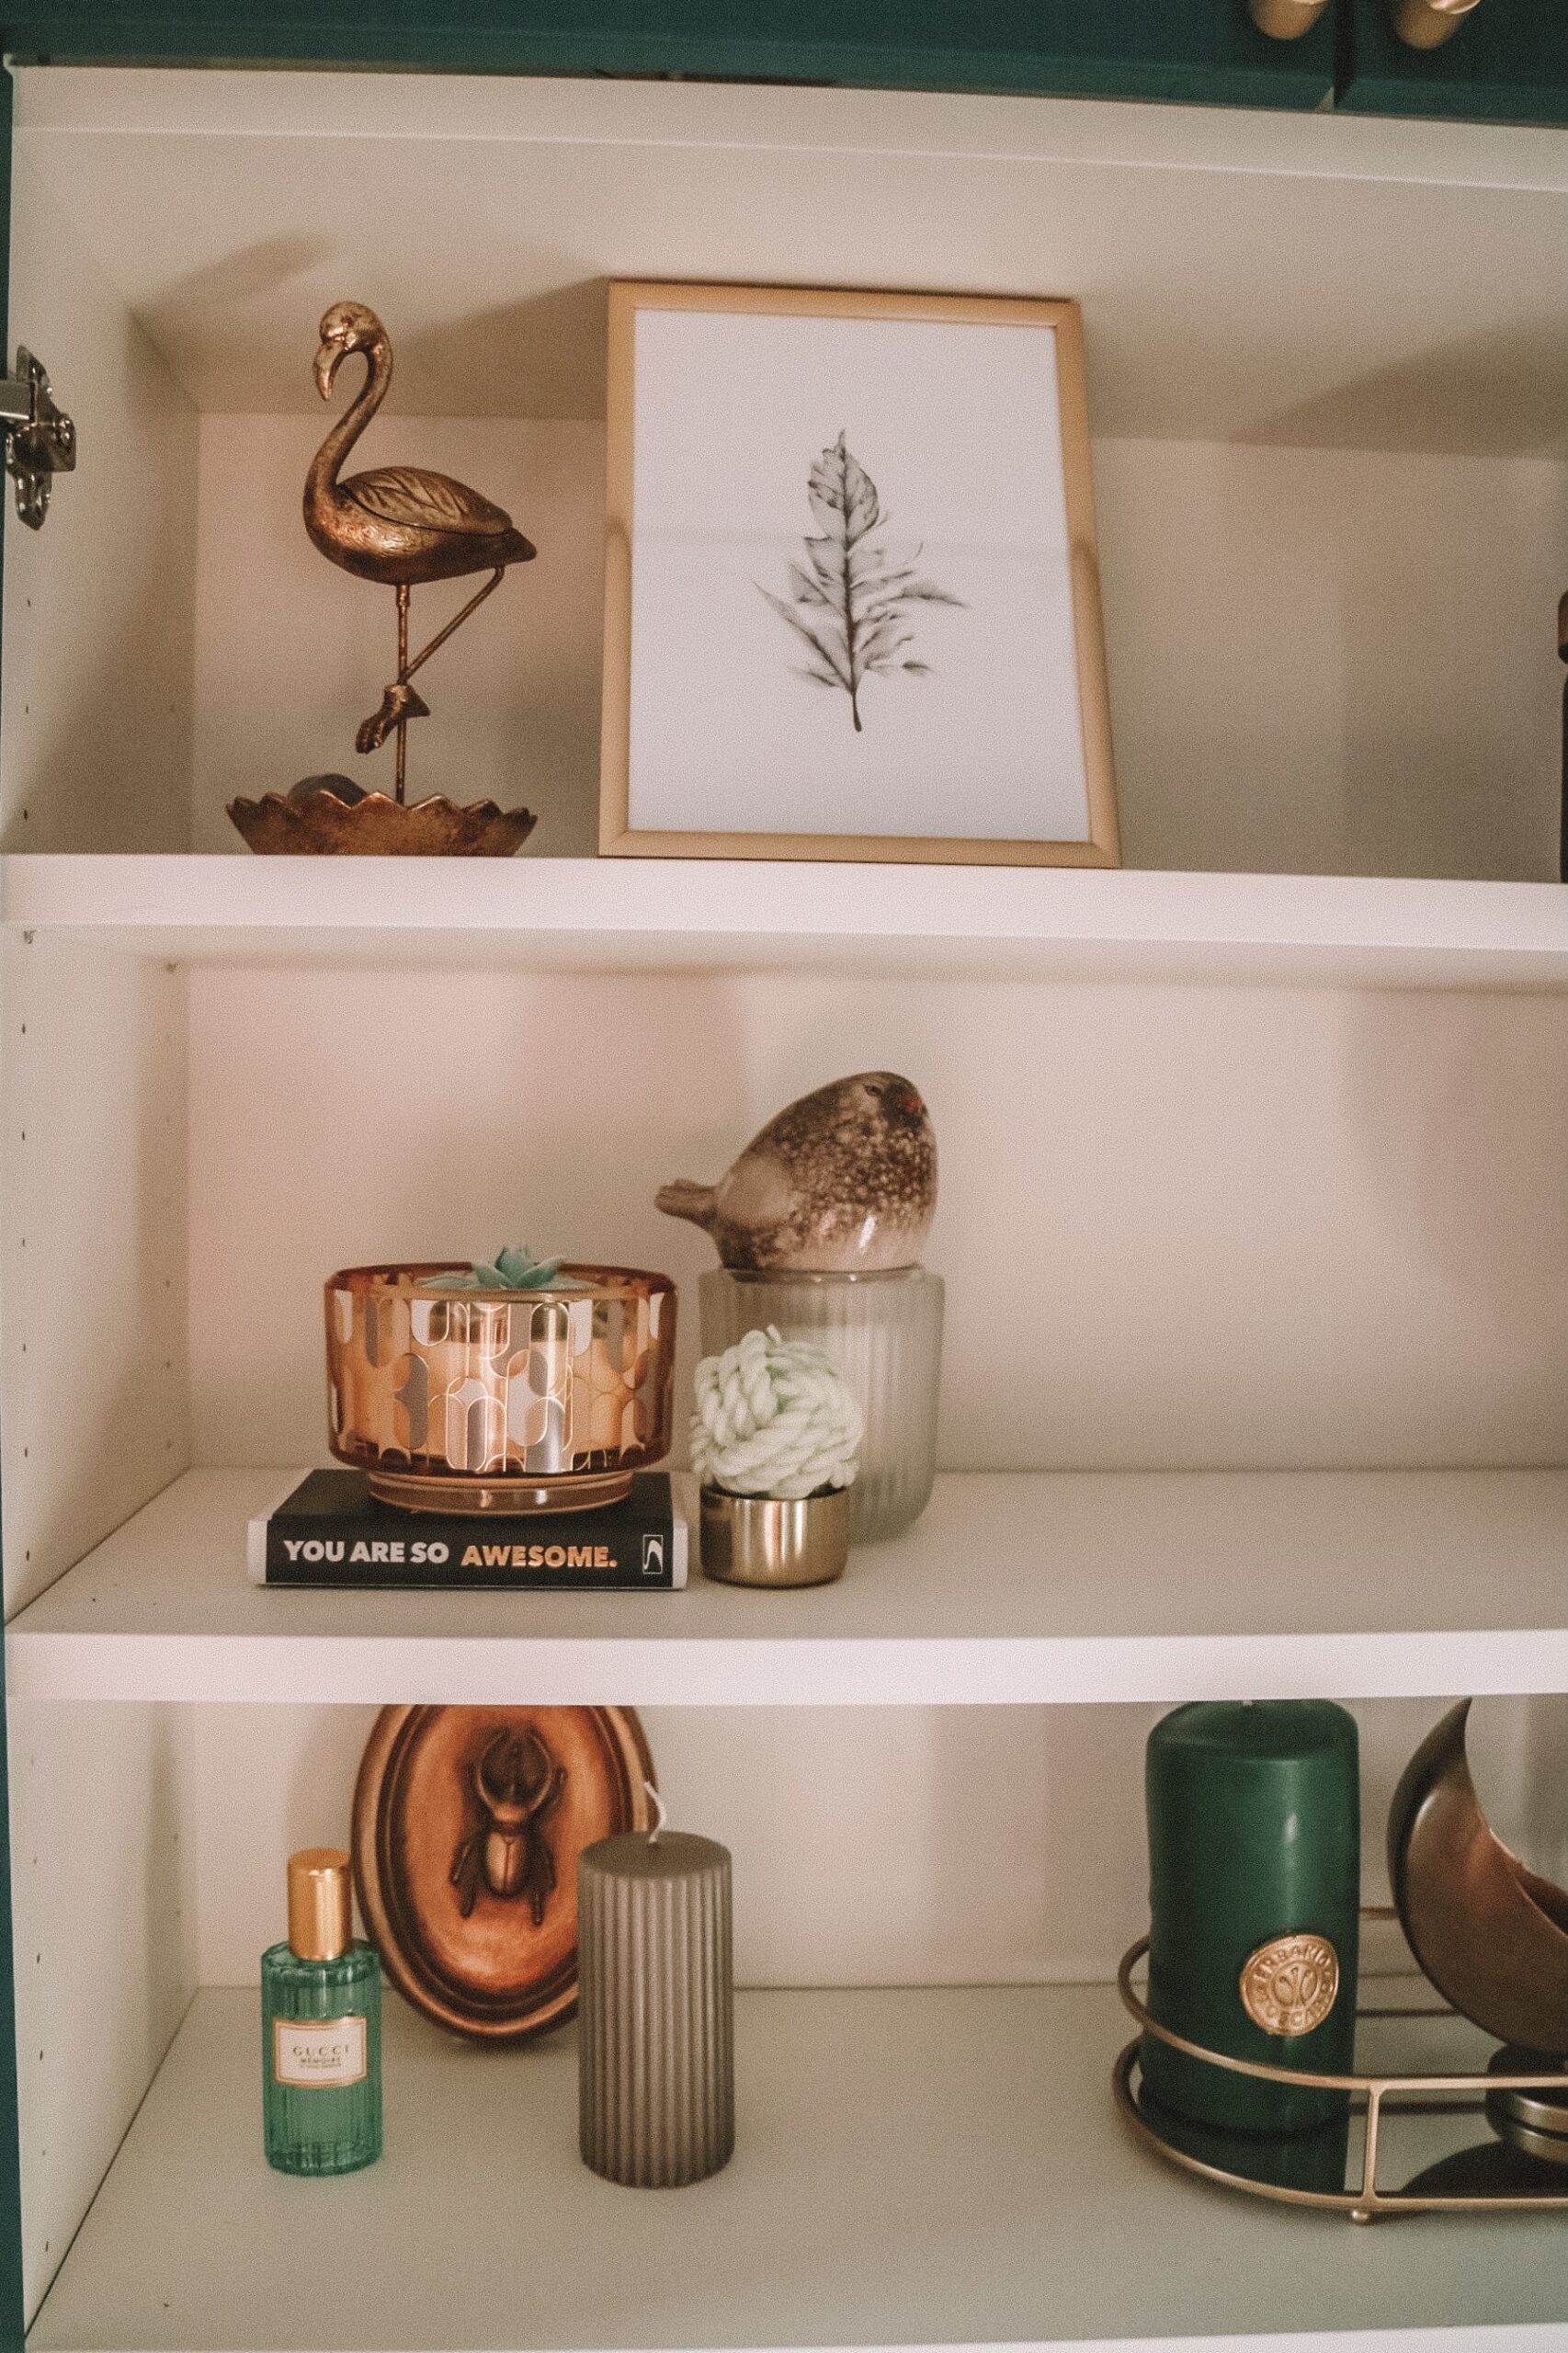
Here I’ve ensured my Johanna Fleming Fine Art Prints* are situated on opposite sides of the cabinet and with space in between them so not directly opposite! I’ve also ensured when I’ve used books and notebooks that they are again on opposite sides or stacked vertically to bring in some differences between them. I’ve also used single objects next to groupings of them on the same shelves so one shelf never has too much on it and there’s some for the eye to stop when looking at them. As I had some larger bits I needed to add I’ve focussed them towards the base to keep the eyeline shelves more decorative and the ones below less so. It helps to keep the gaze on where the interest is rather than looking at the more functional pieces like the drawers and F&M Basket.
Grouping
I was always taught to group in 3’s or 5’s and I have to say that has served me well! You can see across the shelves I’ve naturally gone for those number groupings in the majority of the display. It wasn’t conscious but I think it just looks better! Where there are groupings always look at the colours of the objects as well as the size to bring some styling to it.
Don’t be afraid to stack to add more height where you need it. For example, I’ve used a clear candle pot to lift up my ceramic bird so it can be seen more and fills the space. You hardly notice the base he’s on thanks to it being so neutral and the fact my amazing Twin Burns candle is in the forefront. I think it works so well! Where I have a larger grouping I’ve tried to keep the other side less busy to keep the balance I mention above.
Colour
For me, I had a clear colour pallet for this room. Think peacock feather with hints of pink and brass/gold. With the Oxberg doors being teal I didn’t want to add too much colour to the unit as well. So I used the shades in the room as pops of colour across the shelves. Again balance is key. Try not to group all the colour on one section, ensure it’s spread across the unit you are styling. Where I do have similar colours on the same shelf I’ve tried to keep them apart. Like where I’ve used the Rituals Candle* at one side and the Gucci Perfume* at the other. I’ve then let the gold and brass do the talking, using gold frames and objects to tie in all the shelves together.

I promised a competition and here it is: head over to my Instagram and look for the picture of the bee print. Follow the steps on there to enter and you can win 3x A4 (mine are smaller,A5) fine art prints of your choice! It closes at 7pm on Wednesday 31st March so be quick!
So what do you think? I’ll pop a list of anything that’s on the shelves below. Where it’s a vintage piece or old piece I’ll try and find some similar bits! So if there’s anything that catches your eye you can shop via the links (some may be affiliate!).
Shop the Look
- Monkey statue – originally George at Asda. Similar Three Wise Monkeys Totem £17.95
- Copper Globe George Home at Asda £15
- Flamingo Statue: old. Similar Large Flamingo Ornament here on Etsy £32
- Gold frame Amazon £6.72
- Johanna Fleming Fine Art Print* £15 for A5
- Candle George Home at Asda
- Grand Canyon Glass Cactus- online here (US Site)
- You are awesome book £6.99
- Gold and clear Candles – Presents
- Knot candle £11 Twin Burns
- Ceramic Bird- Local Christmas Shop
- Anthropologie Wanderlust Globe (old). SHEIN decorative globe £7.99
- Gucci Memoire Perfume
- Bug Plaque – old local interiors shop
- Candles (grey* and green) both old
- Brass Tray George Home £8
- Sass and Belle Crescent Planter £13
- Giraffe old Sainsbury’s
- Rituals Candle* Boots
- Alarm Clock IKEA £15
- Turquoise Vase IKEA £6
- Candle Airwick Botanicals from Asda
- Coaster Shein £2.49
- Pineapple Bookends old George Home
- Notebooks Mixture of old, gifts and Papier notebooks (don’t forget the money off code for them here!)
- Fantail Fish £42.50 Bow Boutique. I got mine from Hilary and Flo however it’s not stocked atm
- Vintage Phone from Alexandra Tealeaf sale on Insta! Similar here for £25.99
- Wooden Drawers old George Home
- Fortnum and Mason Hamper Vintage but available here
- Llama Candle Holder old
- Cat Bed similar here on eBay
- Ikea Billy Bookcase and Oxberg Doors
*Item/s are chosen by me and provided as PR product for consideration of review. As always all thoughts, opinions and photos are my own. For further details, please refer to my PR and Disclaimer Page in the menu above.