This has been an effect I’ve been trying to master for a long time, and I finally think I’ve got it!
I love the ombré nail look, but haven’t really been able to get it quite as good as I wanted it to be, this changed last week so I took pics as a tutorial to hopefully help others in the same situation as me!
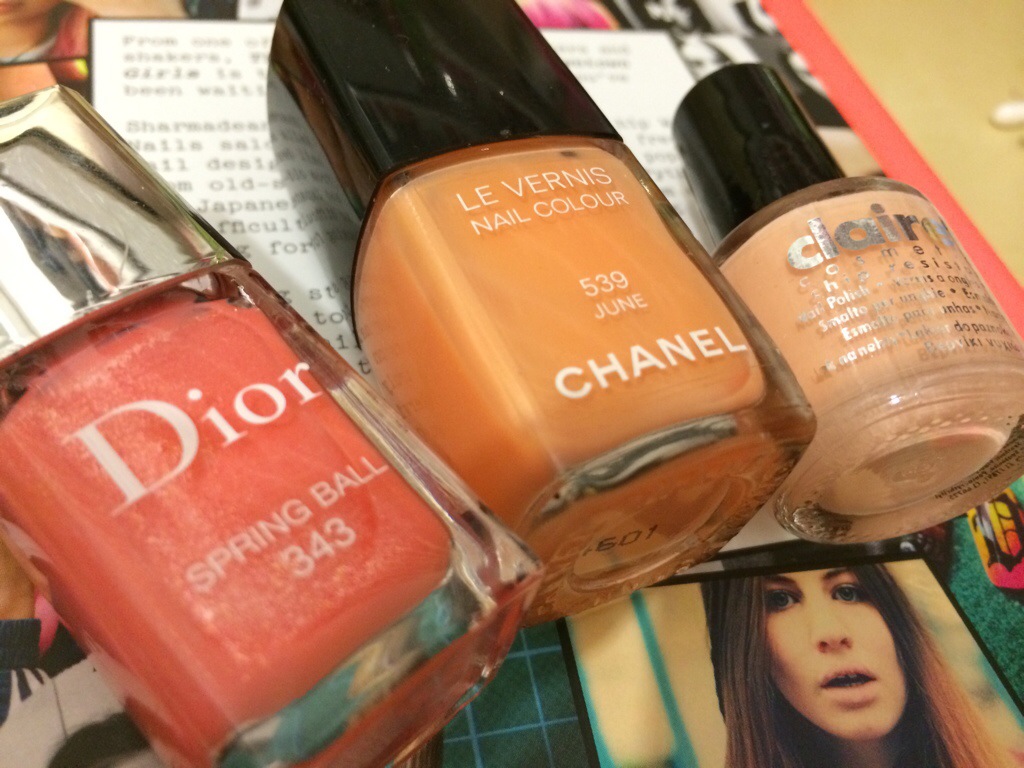
My colour choice was based around my new Chanel nail polish in June I bought from Depop, which I love! I picked a lighter shade from Claires and a darker shade by Dior to help me complete my ombré look.
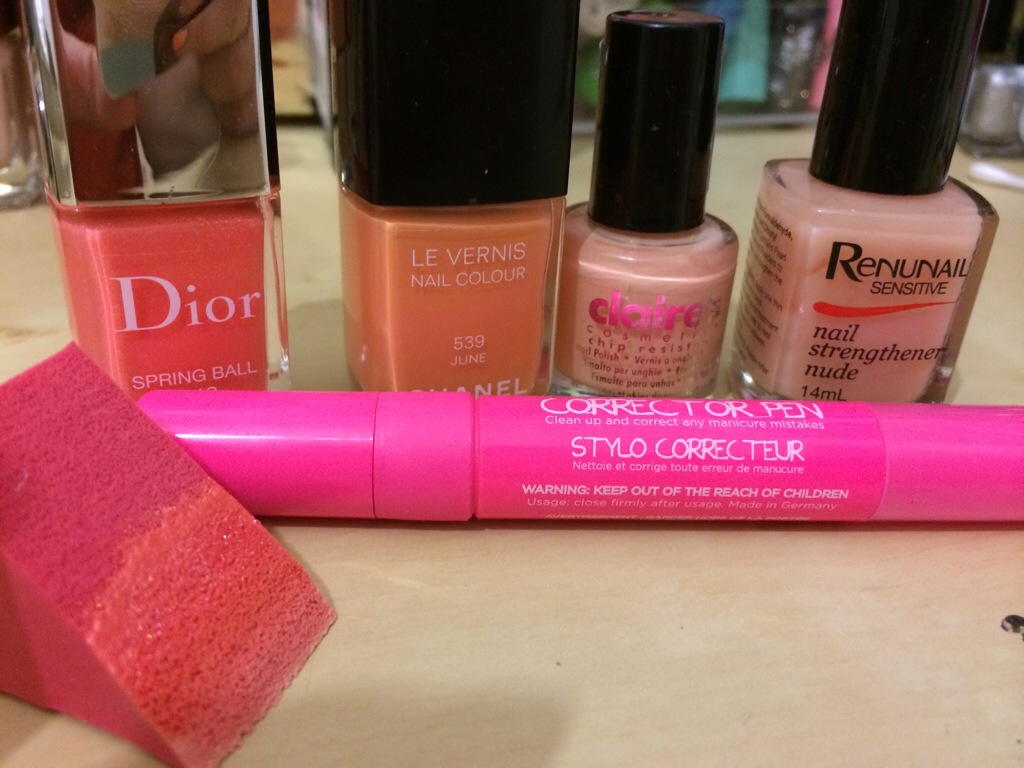
You will also need :
A makeup sponge
Cuticle Oil
Lots of cotton buds/a nail remover pen
A good top and base coat (of course!)
The first step is to paint the lightest colour as a base across your whole nail. I used 2 coats of the claires polish. Leave it to dry , if it’s too wet the sponge will pull it off!
Whilst you are waiting apply cuticle oil around the nail, this will work as a barrier to the nail polish on your skin.
The next step is to paint 3 stripes directly into the sponge from each bottle, starting with the lightest at the tip. Overlap these a little as it will blend better on the nail.
The first time you do it remember the sponge will soak a little up so I’d suggest about 3 strokes for each stripe.
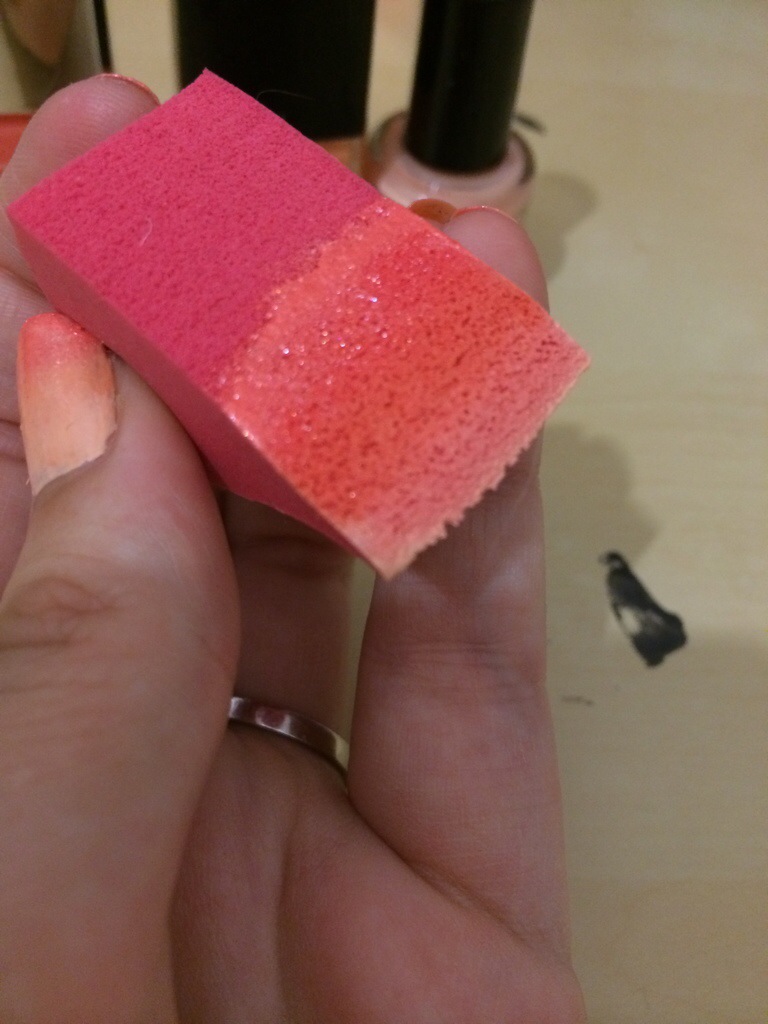
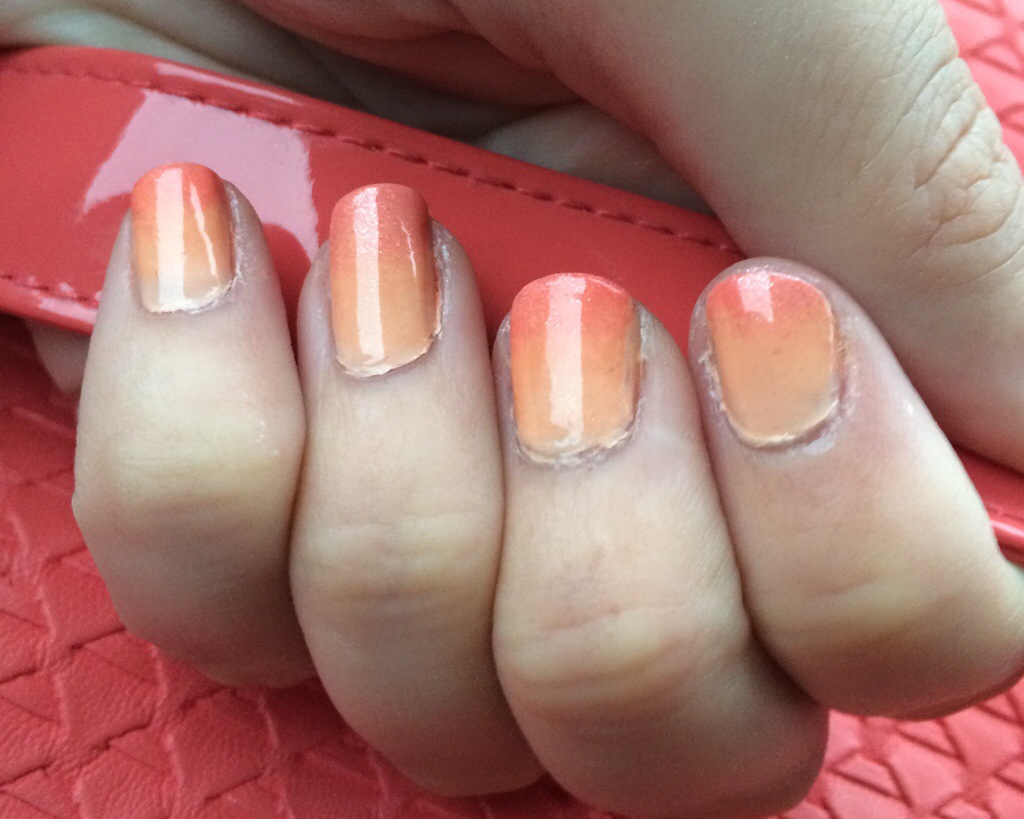
Whilst it’s wet, gently press the sponge go to each nail, I found each sponge application did about 3-4 nails, build up the colour with the sponge gently dabbing and moving slightly up the nail to help the ombré blend.
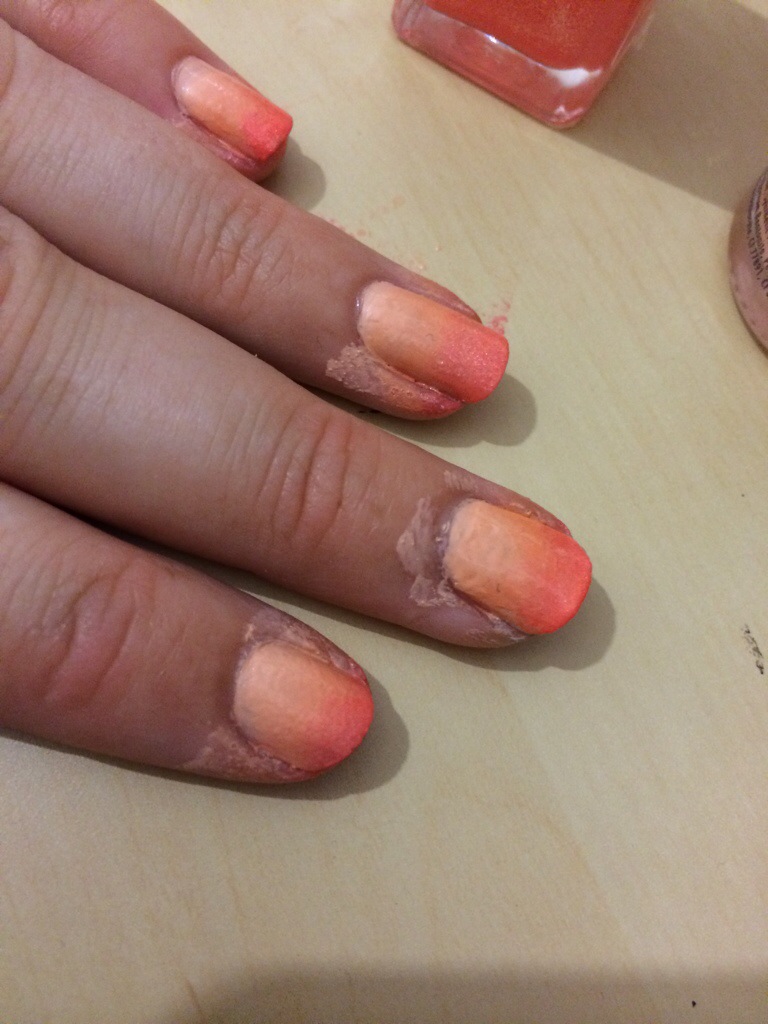
Messy shot! This is what your nails will look like if you don’t apply cuticle oil prior! Be ready with lots of cotton buds for the clean up.
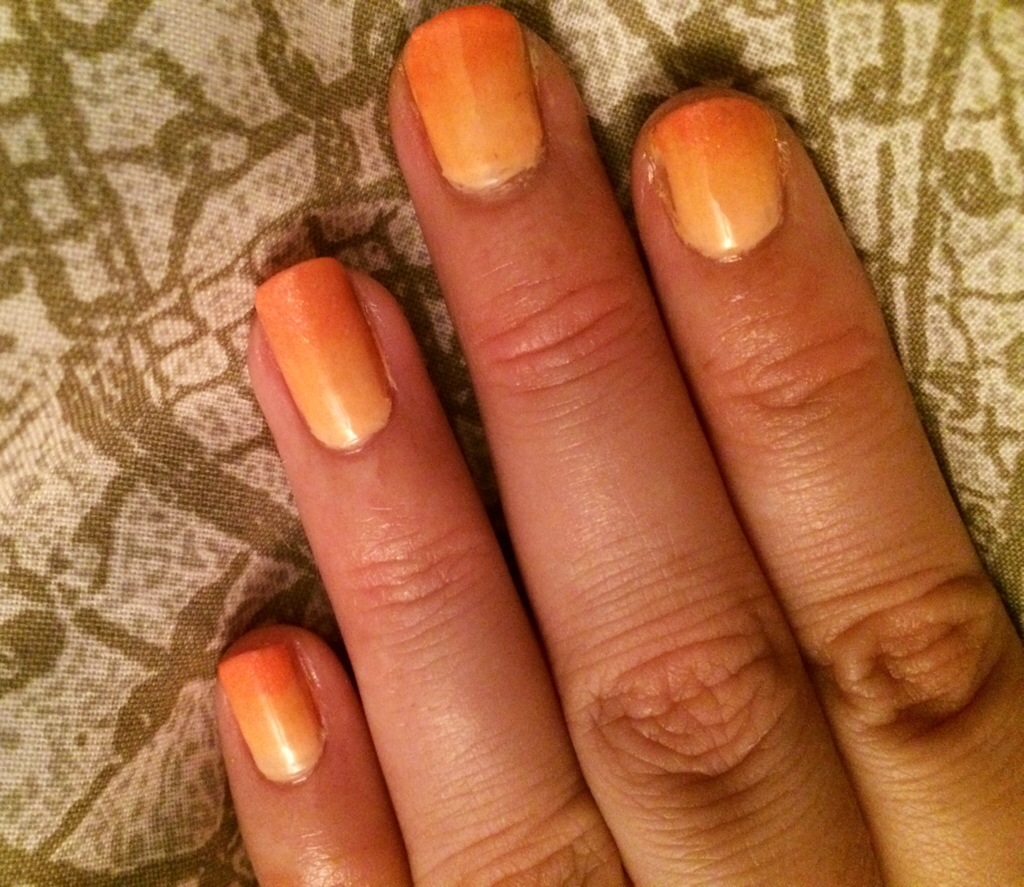
Finally finish with a glossy top coat and voila! Let me know if you try this and I’d love to see the pics! Tag me on twitter @lucy_earnshaw x